Liquify are official Shopify Experts & Partners since 2014. If you follow a link to Shopify from our website and make a subsequent purchase this may result in a commission at no extra cost to you. Our opinions remain our own.
(Updated:May 2020)
Sometimes you might want to have a Shopify ecommerce store designed on a subdomain of your main website.
For example you might have yourdomain.com using WordPress and then want a new Shopify store developed on store.yourdomain.com.
At this point you’ve probably got a domain for the shopify store as something like mystorename.myshopify.com
In this guide I’ll take you through the steps to change the Shopify store domain from mystorename.myshopify.com > store.yourdomain.com.
Please note that if your store has been live for some time you will need to take some additional steps so as to not lose your valuable Google positions. Consult with an SEO if doing this. The guidelines below are for new stores that are just launching.
This article is about managing a store on a subdomain with Shopify. If you’re looking for Shopify email hosting then please go to https://Shopped.email or help with DNS records and email hosting.
This is actually super-easy to achieve and takes around 5 minutes to complete the domain setup. So long as you have a Shopify store setup along with access to the domain account then you’re ready to go.
The way in which you’ll do this will depend on your specific setup. I’m guessing that you are using cPanel with your host for the main website – if not then your host/domain registrar should have documentation for how to add CNAME and ANAME records (because that’s what we’re going to be doing).
Step 1 – Login to your cpanel hosting account (or alternative) and go to the Simple DNS Zone Editor.

You need to add 2 CNAME records which point to your store – so scroll down to the CNAME section (not A Record).

The first will be:
Name: store.yourdomain.com.
CNAME: mystorename.myshopify.com
The second will be:
Name: www.store.yourdomain.com.
CNAME: mystorename.myshopify.com
Step 2 – add your domains to Shopify admin
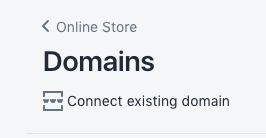
Login to your shopify store and go to online store > domains > connect existing domain

You need to add an existing domain to your Shopify store. So just click the button to connect an existing domain in the top right hand corner.
You can call your subdomain whatever you want but in this example we’re going to call it store.
So add the domain store.yourdomain.com – remembering to change “yourdomain” to your domain.
Then we need to add the www version of the domain – so add www.store.yourdomain.com – remembering to change “yourdomain” to your domain.
Once those have both been added you just need to do one final thing
Step 3 – Set the preferred domain in Shopify
DNS changes can take some time to propagate so it might be a good idea to wait 24 hours before doing this final step – up to you. We changed ours immediately and it was fine but not all domains are the same – if you do decide to change it then don’t make the website public for 24/48 hours.
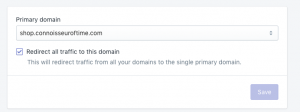
Login to Shopify and go to online store > domains and select the primary domain you wish to use – you can use the www. or the non-www version.

Once you’ve set and saved the primary domain – just go around and check everything to make sure it’s all working. It may take some time for SSL to be issued on the subdomain and for the DNS to propagate but your new Shopify store on a fancy new subdomain should be good to go in 24-48 hours.
If you need help one of our Shopify developers to help you with this process then just Contact us – we’re always happy to help.


